Sentry Firewall
The Sentry Firewall protects your WordPress login page (wp-login.php). It records who tries to sign in to your site, from where, and in which browser language. It also blocks addresses that keep getting sign-ins wrong or that break the rules you have set.
The firewall is part of the Sentry WordPress plugin. You manage it from two places: the plugin's settings in WordPress, and your site's Firewall page on the Sentry dashboard.
- For setting up the plugin - Sentry WordPress documentation
- For the challenges shown on your forms - Verification methods
Each section below is tagged with where you will find it:
- Plugin the Sentry plugin in your WordPress admin, under Settings > Sentry
- Dashboard your site's Firewall page on the Sentry dashboard
- Both available in the plugin and on the dashboard
Overview
Every sign-in attempt that reaches your login page is checked by our cloud service. The service looks at:
- the country the request comes from,
- the visitor's browser language,
- how the request was made, and what browser or tool made it,
- whether the username is one that automated scanners commonly try.
Your site also counts failed sign-ins from each address. An address that fails too many times in a short period is blocked. You choose how strict this is with the protection level.
The cloud holds your firewall settings and the list of blocked addresses. Your site keeps a copy of both, so it can refuse a blocked visitor straight away, before WordPress has loaded. This stops a flood of requests from slowing your site down.
Modes
The firewall has three modes. We recommend moving through them in order: watch first, check what you see, then protect.
| Mode | What it does |
|---|---|
| Off | The firewall does nothing and records nothing. Use this if you only want Sentry's challenges. |
| Watching | The default. Every sign-in is recorded and checked, but nobody is blocked automatically. Sign-ins that would have been blocked are flagged so you can review them. |
| Protecting | Every check is enforced. Addresses that break your rules or fail too often are blocked. |
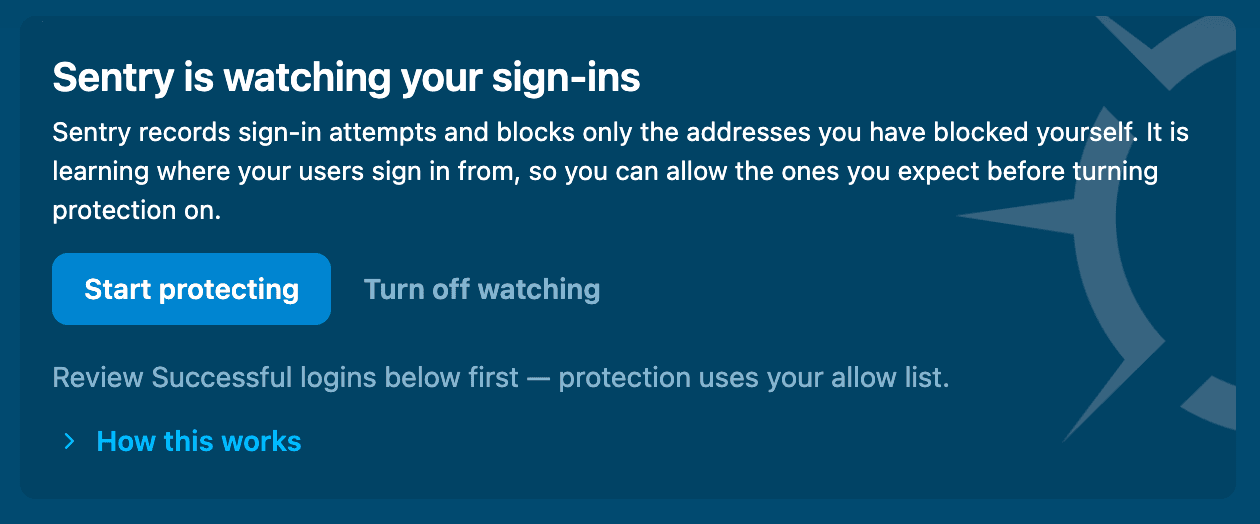
Plugin - Firewall status banner
Before you switch to Protecting, look at the Failed logins tab in the plugin. The addresses flagged there are the ones that Protecting would have blocked. If any of them are you, your colleagues or your office, add them to the allow list first.
Addresses that you block yourself are blocked in Watching as well as Protecting.
Some sign-in protection works in every mode, including Off. WordPress normally reveals whether a username exists through its error messages and the "lost password" form. Sentry replaces those messages with general ones, so attackers cannot find out which usernames are real.
Protection levels
The protection level sets how quickly an address is blocked, for how long, and whether the block covers your whole site. You set the level on the Sentry dashboard.
| Level | What is blocked | Failed sign-ins before a block | Block lasts |
|---|---|---|---|
| Light | The login page only | 5 in 15 minutes | 24 hours |
| Standard | The whole site | 5 in 15 minutes | 24 hours |
| Maximum | The whole site | 3 in 15 minutes | 7 days |
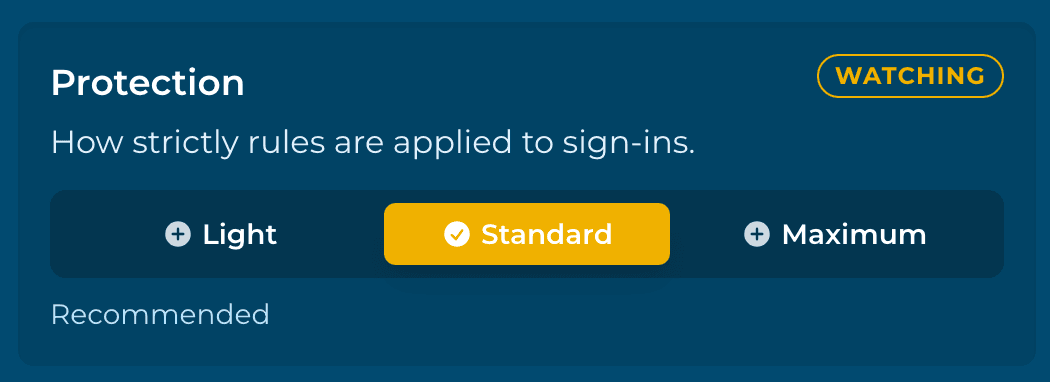
Sentry dashboard - Firewall, protection level
A blocked visitor on the login page sees a short message telling them their network has made too many sign-in attempts. At Standard and Maximum, the rest of the site responds as if it does not exist (a 404 page).
Countries and languages
You can choose which countries and browser languages may sign in.
- If a list is empty, there is no restriction. Sign-ins are accepted from anywhere, or in any language.
- If a list has entries, sign-ins are restricted to those countries or languages.
In the plugin, the Successful logins tab shows the country and language of each real sign-in. You can add them to your lists with a single click. To remove a country or language, use the Sentry dashboard.
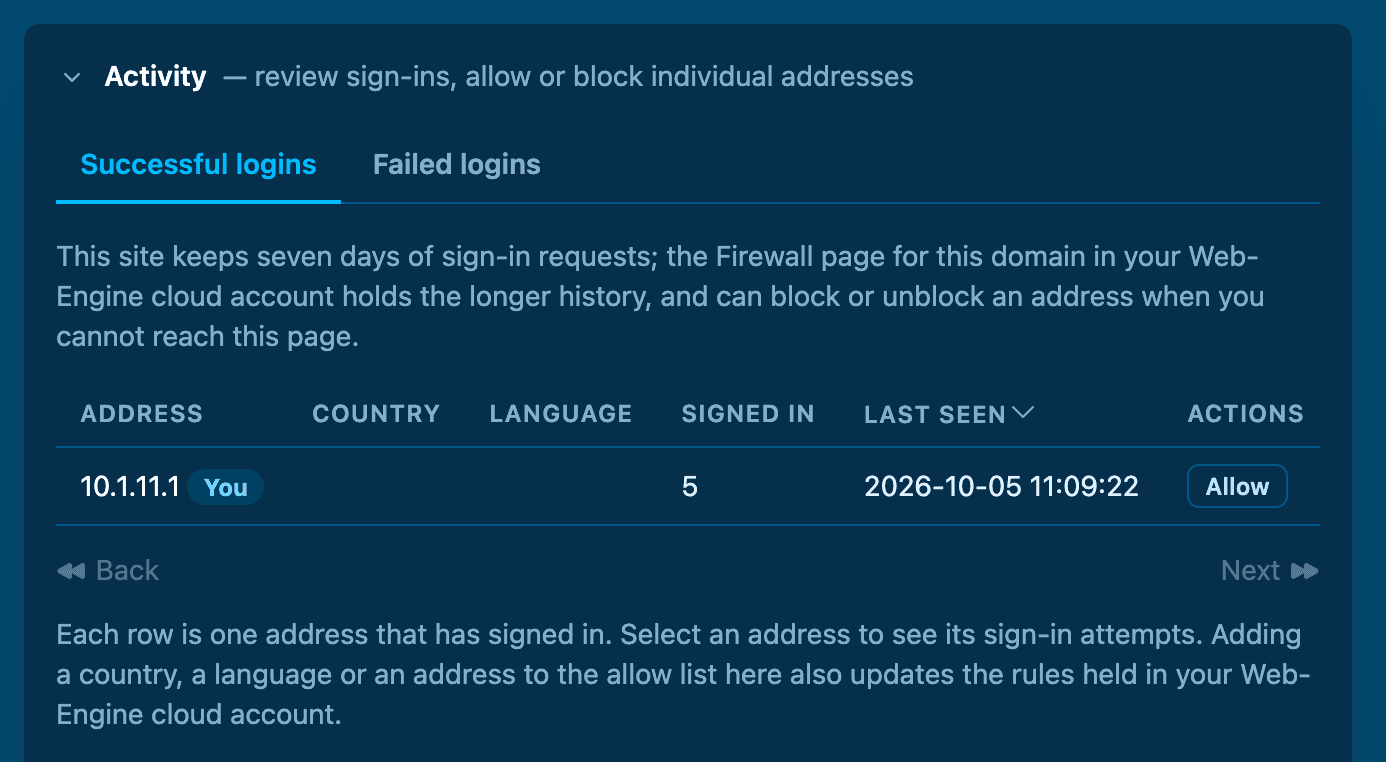
Plugin - Activity, Successful logins tab
Allow list
Addresses on the allow list skip every check. This includes the country and language rules and any existing block. Adding an address to the allow list also removes any block on it.
You can add an address to the allow list:
- from the plugin, by choosing an address on the Successful logins tab,
- from the Allowed tab on the Sentry dashboard. Here you can add any address, including one that has never signed in, such as a new office.
You can only take an address off the allow list from the Sentry dashboard.
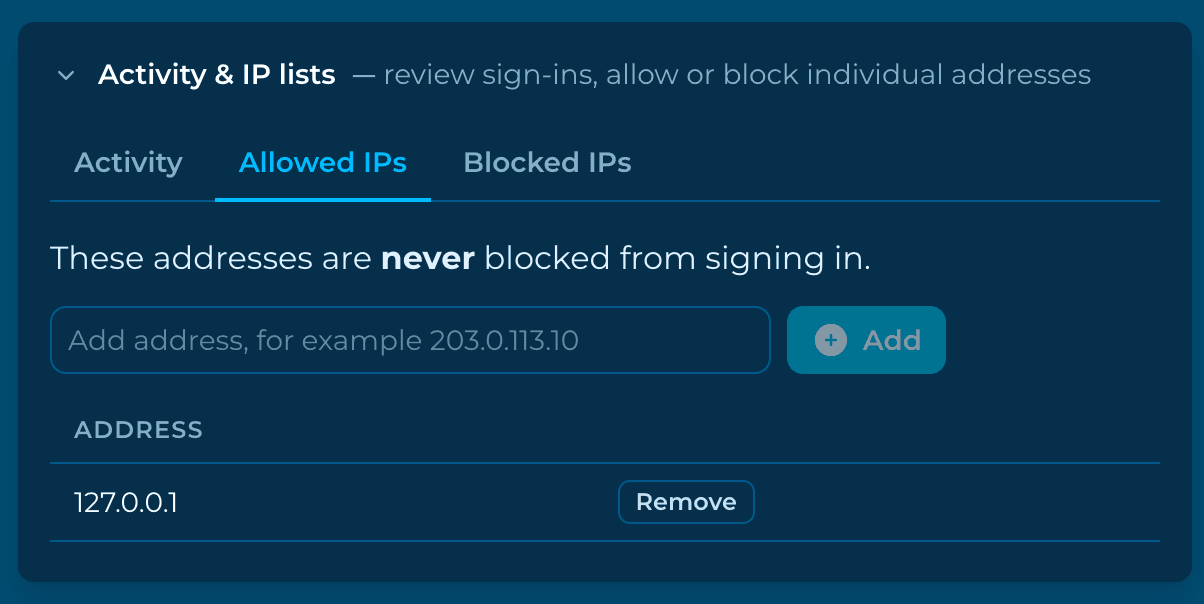
Sentry dashboard - Firewall, Allowed tab
Blocking and unblocking
You can block an address yourself. You can also lift a block that the firewall has placed.
- In the plugin, use Block or Unblock on the Failed logins tab. The plugin will not let you block the address you are using, so you cannot lock yourself out from WordPress.
- On the Sentry dashboard, the Blocked tab lists every blocked address for your site. From here you can block any address, including your own.
Blocks you place yourself do not expire. They stay in place until you remove them.
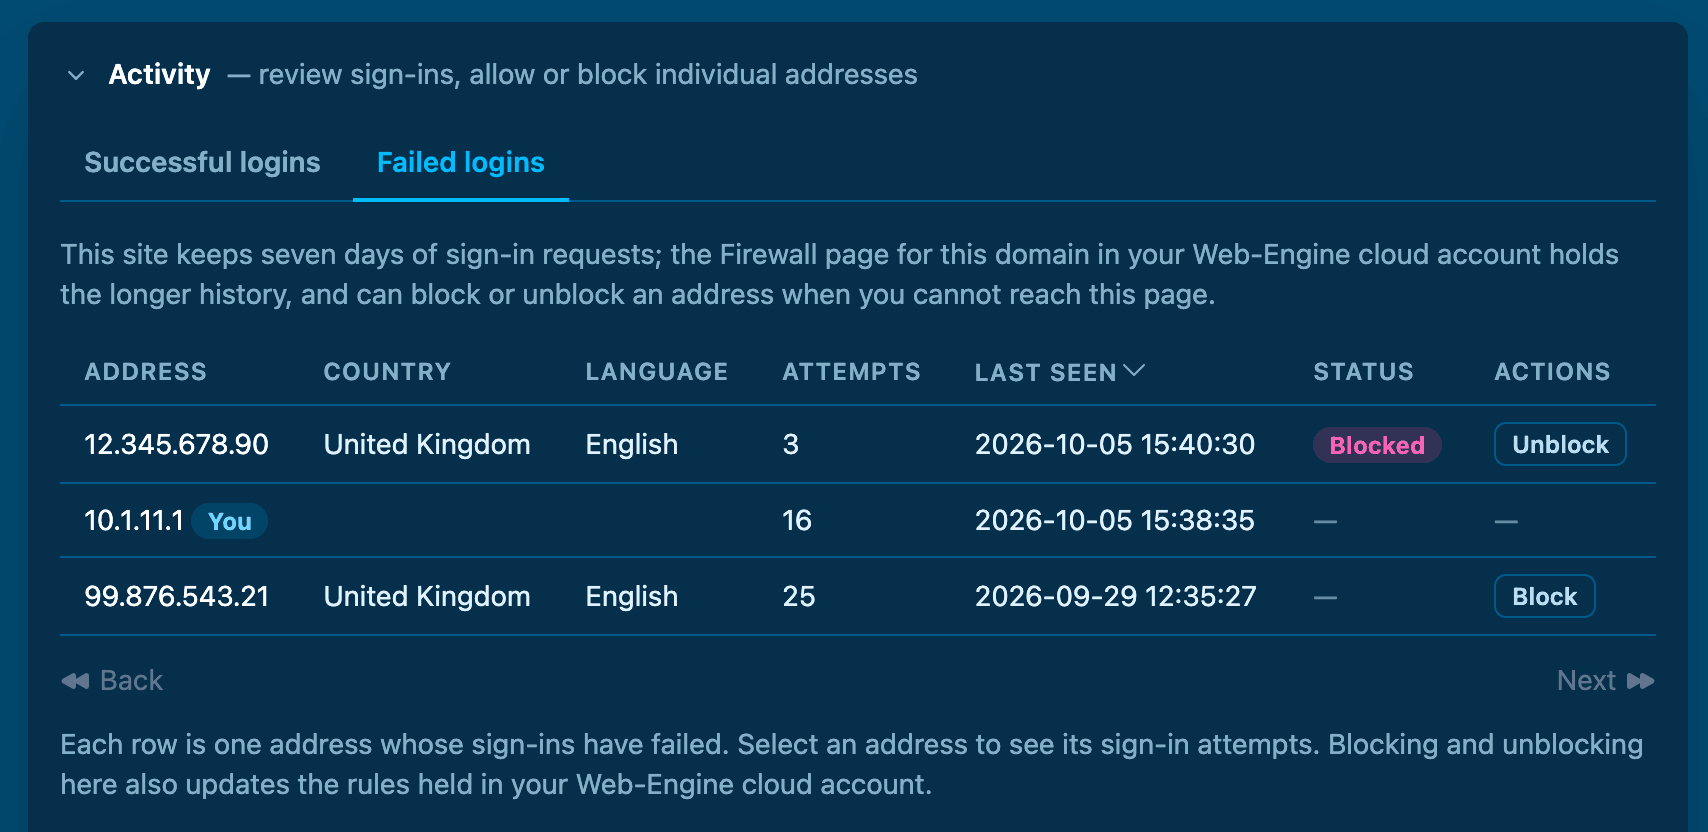
Plugin - Activity, Failed logins tab
Each site is judged only on its own rules and blocks. An address blocked on one of your sites is not blocked on your other sites.
Managing in the cloud
The plugin covers the day-to-day tasks: choosing the mode, building your lists from real sign-ins, and blocking or unblocking addresses. Everything else is on the Sentry dashboard.
| Task | Plugin | Sentry dashboard |
|---|---|---|
| Switch between Off, Watching and Protecting | ✓ | ✓ |
| Choose the protection level | ✓ | |
| Add a country or language | ✓ | ✓ |
| Remove a country or language | ✓ | |
| Allow an address seen signing in | ✓ | ✓ |
| Allow any address | ✓ | |
| Remove an address from the allow list | ✓ | |
| Block or unblock an address | ✓ | ✓ |
| See the full blocked list | ✓ | |
| See activity older than seven days | ✓ |
To open your site's firewall page, select Manage in cloud under Activity in the plugin. You will be signed in to the dashboard and taken straight to the right site. You can also go to the Sentry dashboard, choose your site and open the Firewall tab.
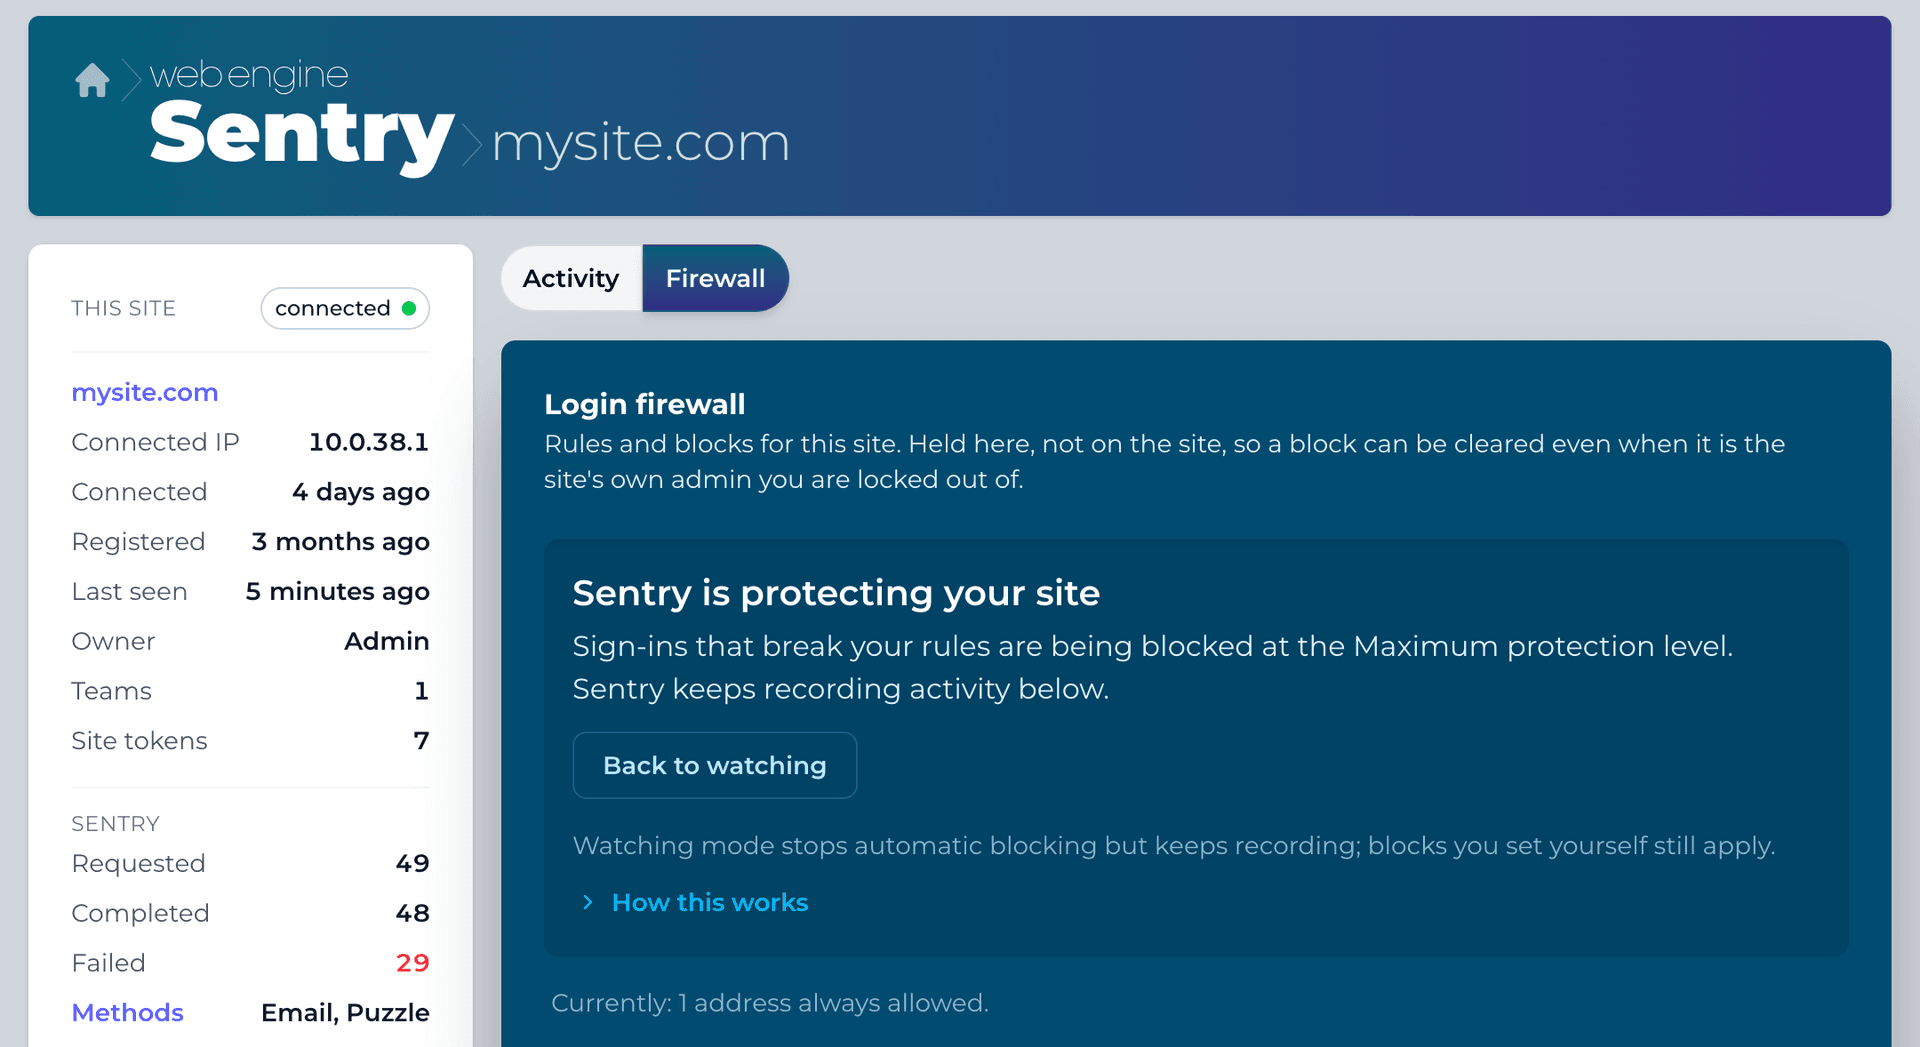
Dashboard - Sentry firewall management
Your site picks up changes made on the dashboard the next time someone tries to sign in, which is the moment they matter. Unblocking an address can take a few minutes longer; see I have been locked out.
Changes made in the plugin are saved to the cloud first. If your site cannot reach our service, the change is refused and you will be asked to try again. Your existing rules continue to protect your site in the meantime.
I have been locked out
If your own address has been blocked, you may not be able to reach your WordPress admin. This is why the firewall can also be managed from the cloud.
- Sign in to the Sentry dashboard and open your site's Firewall tab.
- Find your address on the Blocked tab and unblock it. To stop it happening again, add your address on the Allowed tab.
- Go back to your site's login page.
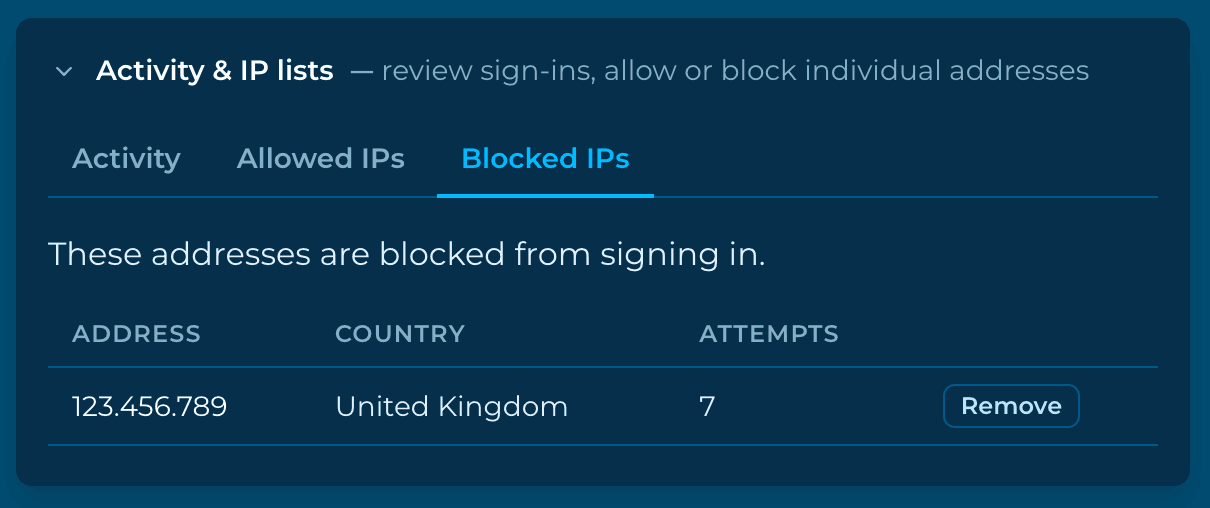
Sentry dashboard - Firewall, Blocked tab
Your site checks with the cloud the next time you visit the login page. If your address was blocked across the whole site, this can take up to five minutes. If you still see the blocked message, wait a few minutes and reload the login page.
Things to know
Private and local addresses. Addresses on a private network, such as 192.168.x.x or 10.x.x.x, cannot be located, so they are never checked or blocked automatically. Their sign-ins are still recorded, and you can still block them yourself.
Site-wide blocking needs a server setting. Sentry adds a small file that PHP runs before WordPress loads. This file is what blocks addresses across the whole site. The plugin tries to set this up for you. If it cannot, it shows a notice in your WordPress admin. Until the setting is in place, Standard and Maximum can only block the login page. Ask your hosting provider for help if the notice does not go away.
Your data. Your site keeps a log of sign-in attempts for seven days. When you uninstall the plugin, the server setting is always removed. The log and the firewall settings are only deleted if you tick the box to remove data on uninstall.
If you have any questions or feedback about the firewall then contact us on Slack or submit a ticket.